

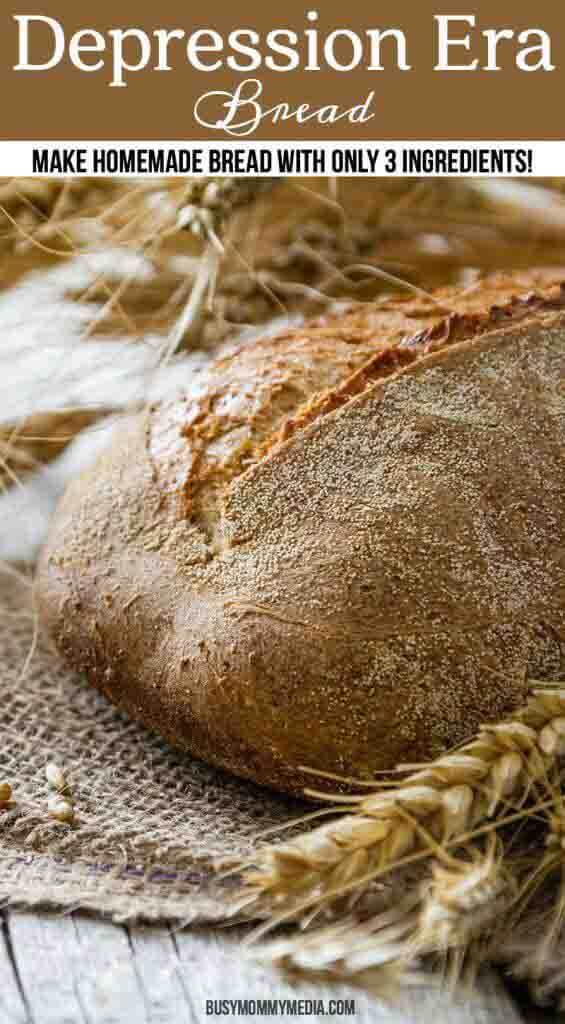
Depression Era Bread – Make Homemade Bread with Only 3 Ingredients!
Sometimes the best foods are not the most complicated. This Depression Era Bread recipe can be made with only 3 ingredients and the end result is a delicious loaf of bread that tastes amazing!

If you are looking for a way to save money, making your own bread is a great place to start. Before you get intimidated and click away, I promise you it isn’t as hard as you think it is.
The best place to start is with this Depression Era Bread.
This bread recipe only has 3 ingredients (with one optional ingredient for extra flavor). It is foolproof. I’m a lazy baker. I only bake things that are fairly straightforward and don’t add any extra stress to my life (no one has time for that). This bread recipe is perfect for that.
You May Also Be Interested in this Post: Make these 3-Ingredient Protein Pancakes
This bread does take a bit of time to make, but in the end, you can make 7 loaves of bread for about $2.50. That’s an awesome way to stretch your food budget! It’s not all hands-on time either so you can work on one task and then get back to your to-do list.
You may also Like:

What is Depression Era Cooking?
During the Great Depression, many families had to cook with basic ingredients and learn to live with less. These families learned some important lessons on frugal living and limiting waste that we can all learn from today.
Read: Use this Free Printable Grocery List to organize your grocery shopping and save.
I love hearing stories from some of the people who lived through the Great Depression. They had to get creative in the kitchen in order to put dinner on the table and what they came up with was often delicious.
I heard some of these stories from my grandmother who put together some of her favorite frugal recipes in a cookbook for us to enjoy. I’ve heard people who lived through the Great Depression say that “Everything was really bad, but the food was good.”
Cost of Depression-Era Bread
Flour: $1.50 (I got it on sale and stocked up.)
Yeast: about $1.00
Salt: pennies . . .
Water: pennies…
So for about $2.50, I made 7 loaves of bread. That’s cheaper than the cost of some single loaves from the grocery store.
Each loaf costs about $0.36, depending on the ingredients you use.
I served this with beef stew and it was amazing. This goes really well with soups or as basic sandwich bread.
The bread was really good. It was more of a rustic type of bread, kind of like French bread, and worked well with hot foods. My family really enjoyed this bread. I gave several of the loaves away as gifts and they were a huge hit. What a neat inexpensive gift. They all raved about it as well.
Give this Depression Era Bread a try and get a little taste of history for yourself!
Depression-Era Bread Recipe
You can make this depression-era bread in your own home with only 3 ingredients plus water.
Depression Era Bread - 3 Ingredients
Sometimes the best foods are not the most complicated. This Depression Era Bread recipe can be made with only 3 ingredients and the end result is a delicious loaf of bread that tastes amazing!
Ingredients
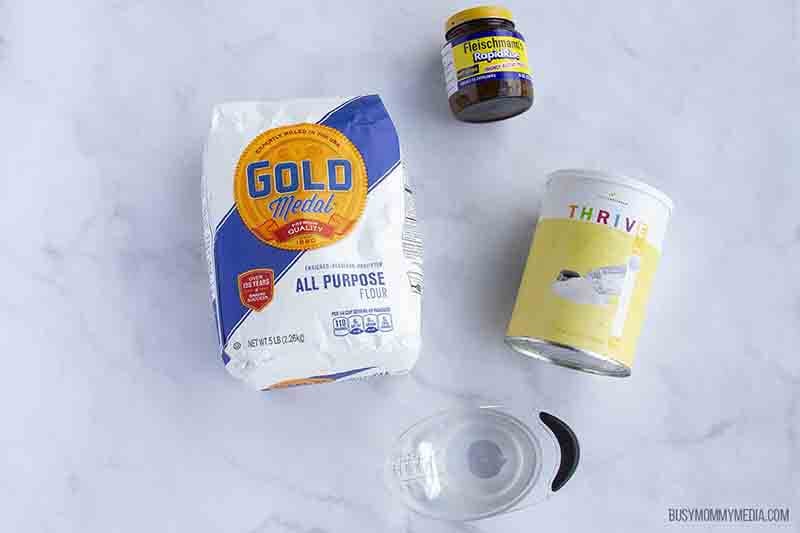
- 5 lb bag All- purpose flour
- 5 TBS Yeast (I used Rapid-Rise yeast)
- 6 Tsp Salt (optional, but I think it added flavor to the bread)
- 6 cups warm water (more or less depending on your dough)
Instructions
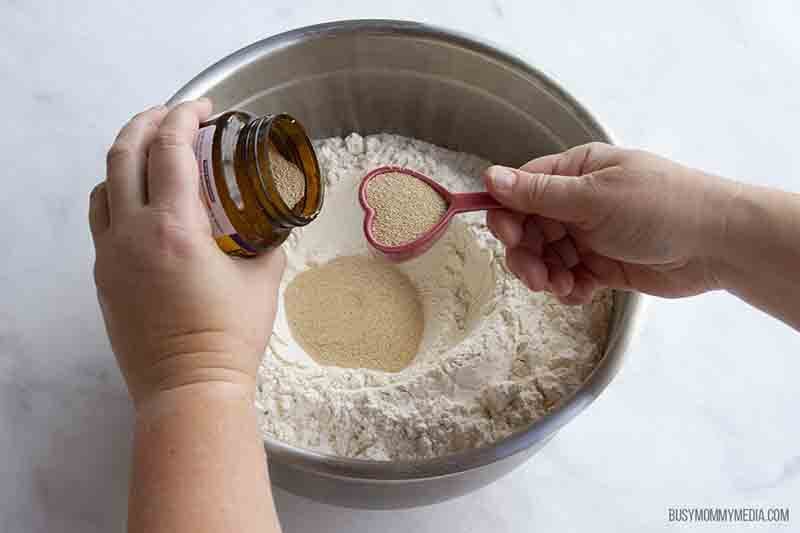
- Pour flour in a large bowl.
- Make a well in the center of the flour.
- Add yeast to well and then add enough of the water to the well to dissolve the yeast (you can use your hands).

- After yeast is dissolved start adding more water and mixing in flour until you form a dough.
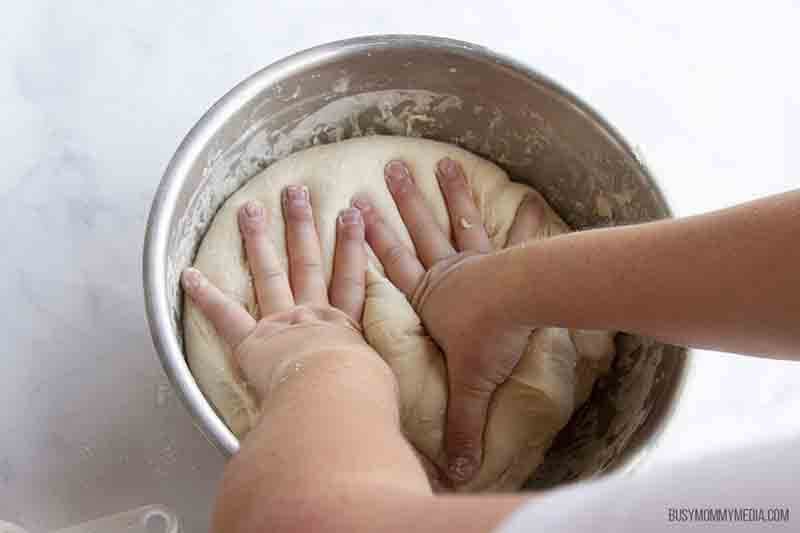
- Knead dough in the bowl for a bit. Let the dough rise in a warm place with a towel loosely covering the top.
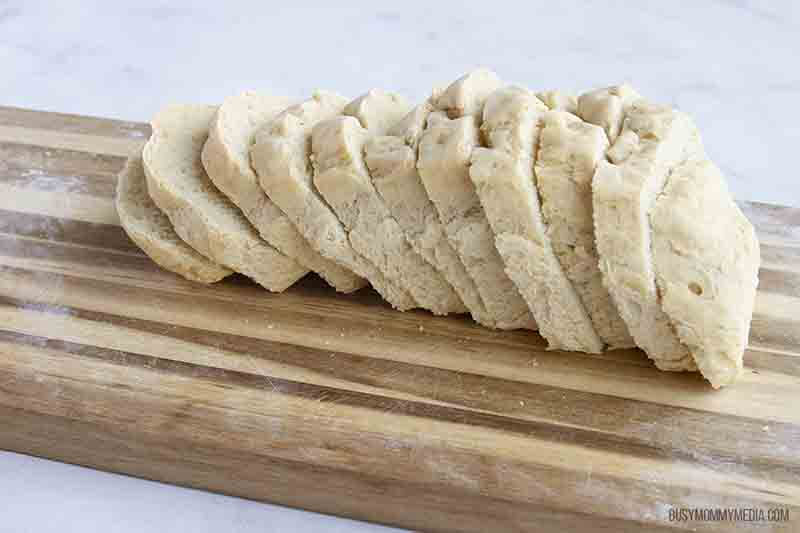
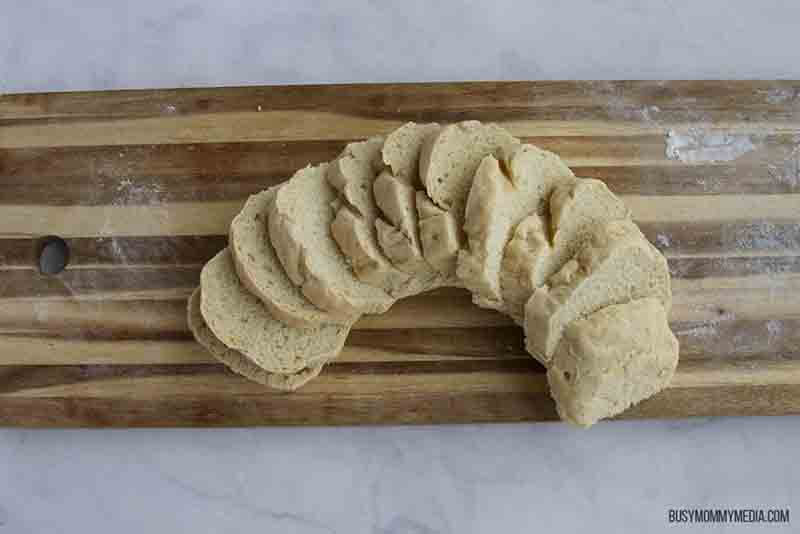
- After it has risen double in size, punch down the dough and divide it up into 7 loaves.
- Shape the dough loaves and put in loaf pans. If you do not have 7 pans, use a cookie sheet and the loaves will come out just as nice fine.
- Let the dough rise for 60 minutes or until doubled in size.
- Make slits in the top of the dough to make it look pretty.
- Bake at 350° until it gets brown on top, about 25 minutes (this will vary a bit based on your oven).

Recommended Products
As an Amazon Associate and member of other affiliate programs, I earn from qualifying purchases.

Nutrition Information:
Yield:
35Serving Size:
1Amount Per Serving: Calories: 241Total Fat: 1gSaturated Fat: 0gTrans Fat: 0gUnsaturated Fat: 0gCholesterol: 0mgSodium: 402mgCarbohydrates: 50gFiber: 2gSugar: 0gProtein: 7g

Pin it for Later


Is it possible to do a smaller batch of the depression era bread? I’m single and would never make I through 5 loaves before they expired! Thanks!
Amy,
I bet you could. The other thing you could do is bake the 5 loaves then freeze the ones you aren’t going to eat right away. I’ve had great luck freezing bread. You just let it thaw completely or freeze it in slices and thaw it in the toaster before eating it.
I make one loaf at a time all the time. Two cups flour. One cup warm water, and one tablespoon yeast.
Thank you! I don’t like frozen bread. Fresh is best. I so appreciate your sharing this!
Freeze Dough before baking. When you divide and dough into loaves, place extra loaves in freezer. When ready to bake, thaw and continue as directed. After thawed the fish will rise as expected. Dough sections will be smaller than baked loaves and take up less room in freezer.
Takes about 8 hours to thaw and rise. I take one loaf out of freezer before work and by the time I get home, it’s ready to bake.
Make them into loaves and freeze them after the first rise. I freeze them in a pan or on a cookie sheet. When I get ready for a loaf I just take one out and let it rise till double and bake. It’s fresh bread all the time. I do this with many of my breads.
Just divide the ingredients by 7 and you will have what you need for one loaf. Want more? Cut it in half and you will have 3 loaves, etc.
You didn’t include how long and at what temp to bake the bread in the recipe.
I’m so sorry. This was a post by a contributor and I’m not sure what temp she used. I’ll try and track her down and find the answer to this.
We added baking temperature. The original recipe was based off a family recipe and adjusts a bit based on your oven. You’ll have to watch it closely the first time and see how long it takes to brown. When the top browns a bit then it is done.
If you look at similar recipes, most are 350 for 20 – 30. The recipe just indicated they need to be lightly browned on top.
Bake at 350° until it gets brown on top, about 25 minutes (this will vary a bit based on your oven).
I haven’t done the math, but sour dough bread would be much cheaper because you only have to buy the yeast once. The best way to get the directions is to borrow The Tightwad Gazette 111 from the library and look on page 90.
We made this in Australia a century before the Depression – it is called damper!
Do you know how many carbs and sugars this recipe has per slice? Would the recipe work with nut flours or Keto ingredients?
Hi Sarah,
I have the same question. With so many types of flour that is more diabetic friendly, I wonder if we can just use the other with the same amount and cooking time. Also was wondering to put something in it like cinnamon.
Hope anyone can help us with this question
Thank you,
Anne
A bottle of beer and enough flour stirred in to make a dough. Turn into a greased loaf pan. Bake at 350 until done.
If you want to save on yeast here is, obstensibly, the same recipe for one loaf: 2 1/2C flour, 1 1/3C water, 1 1/4 tsp salt, 1/4 tsp yeast. Stir until all “wet”, cover and let sit on counter overnite. Add to your baker (ceramic, etc) cover and sit for 2 hours. Bake covered at 450 degrees for about 35 minutes, uncover and bake about 10 minutes more – or until browned (200-210 internal degrees). I add 1/2C cranberries in the original mixture – sometimes pecans, etc.
Wow 5 loaves of bread. I usually make 1 or 2. Looks great though! One note, PLEASE USE SALT IN YOUR BREAD. I don’t consider it optional. It really tastes bland if you forget it. Trust me, I made an awesome loaf of french bread 2 days ago. Forgot the salt, and it was quite noticeable.
Anyway, rant over. Enjoy your bread baking everyone/
As much as I love peanut butter, what can I use to replace it? My youngest daughter is “epi-pen” allergic to peanuts.